Step by Step: How to Adjust Video Brightness Online Free in VidTL
Follow these steps in order.
1) Open the editor and import your clip
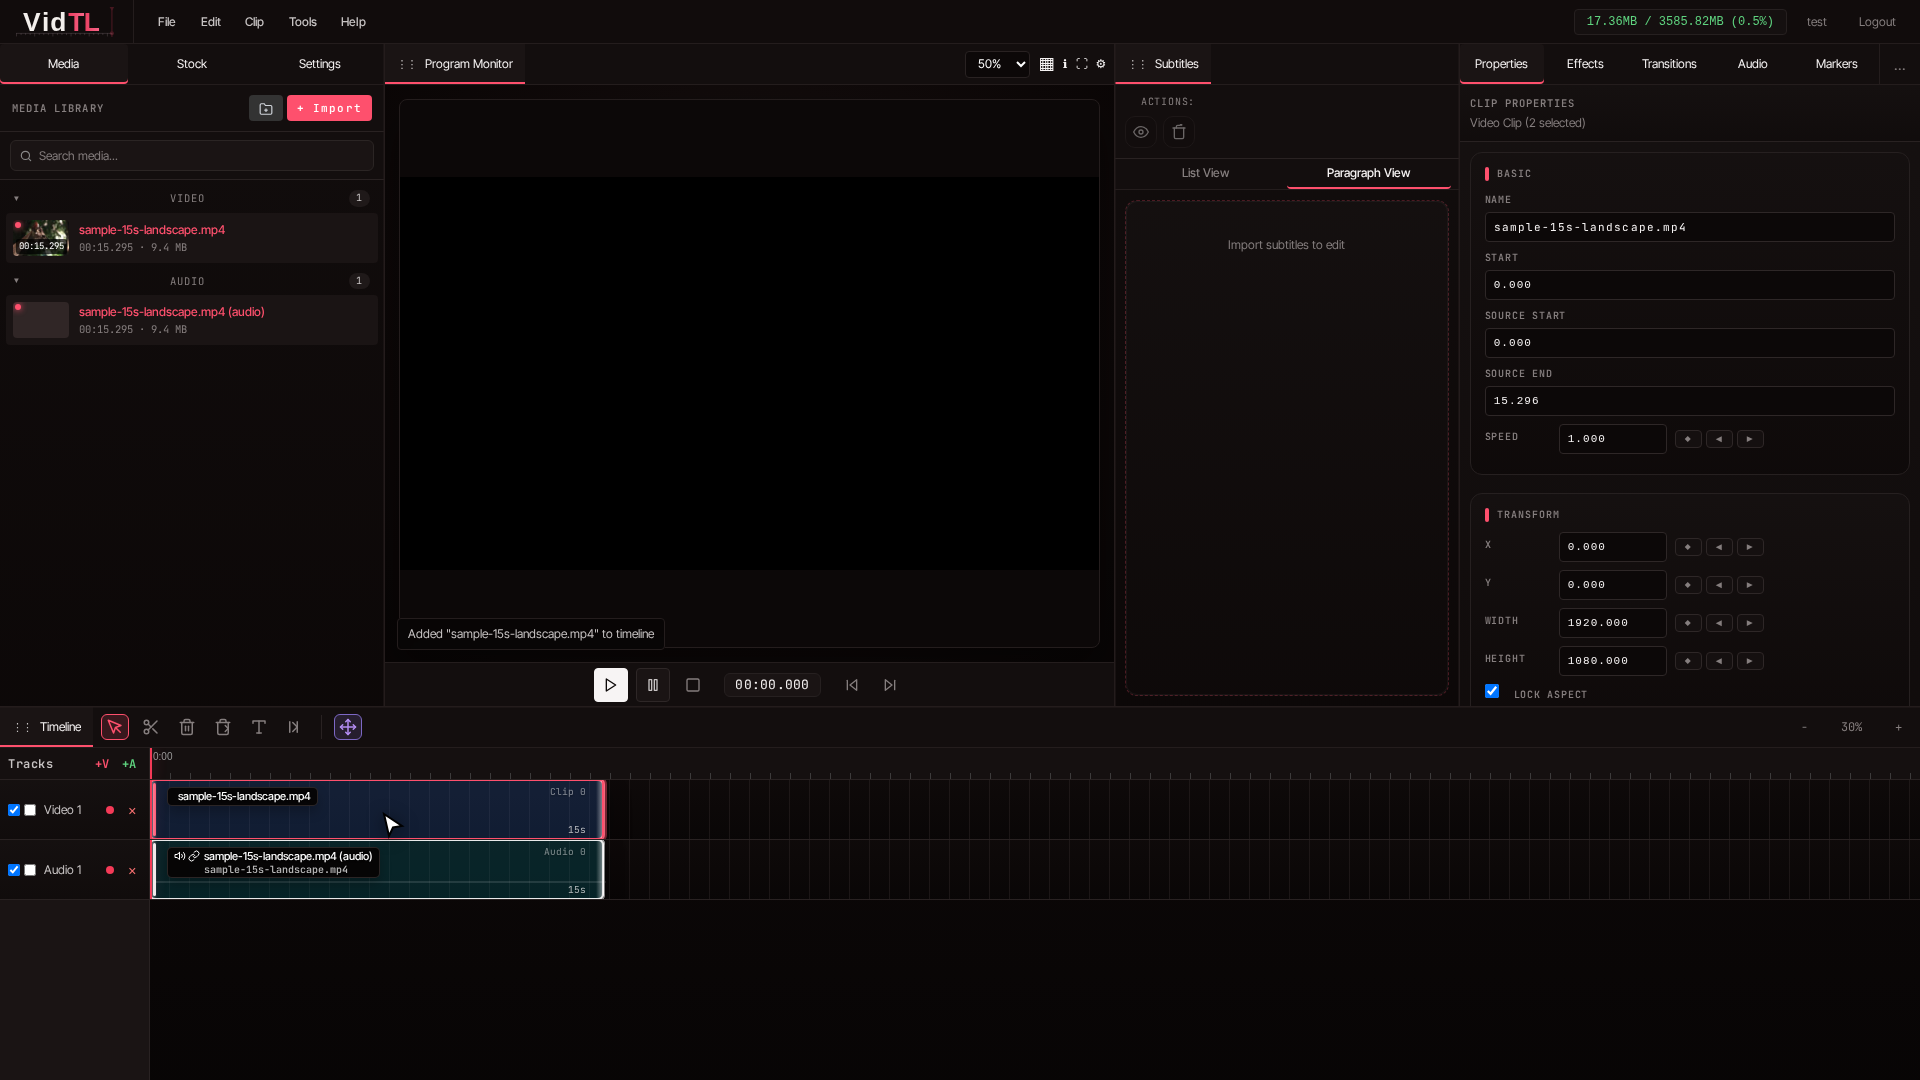
Start by opening VidTL and clicking the + Import button in the left Media panel. Once your file appears in the media library, drag it down to the timeline. If your clip has audio, it may appear on video and audio tracks, which is normal.
2) Select the clip on the timeline
Click the video clip in your timeline once. A selected clip is the one that receives your effect adjustments. If nothing seems to change later, the usual cause is that the clip was not selected before adjusting settings.
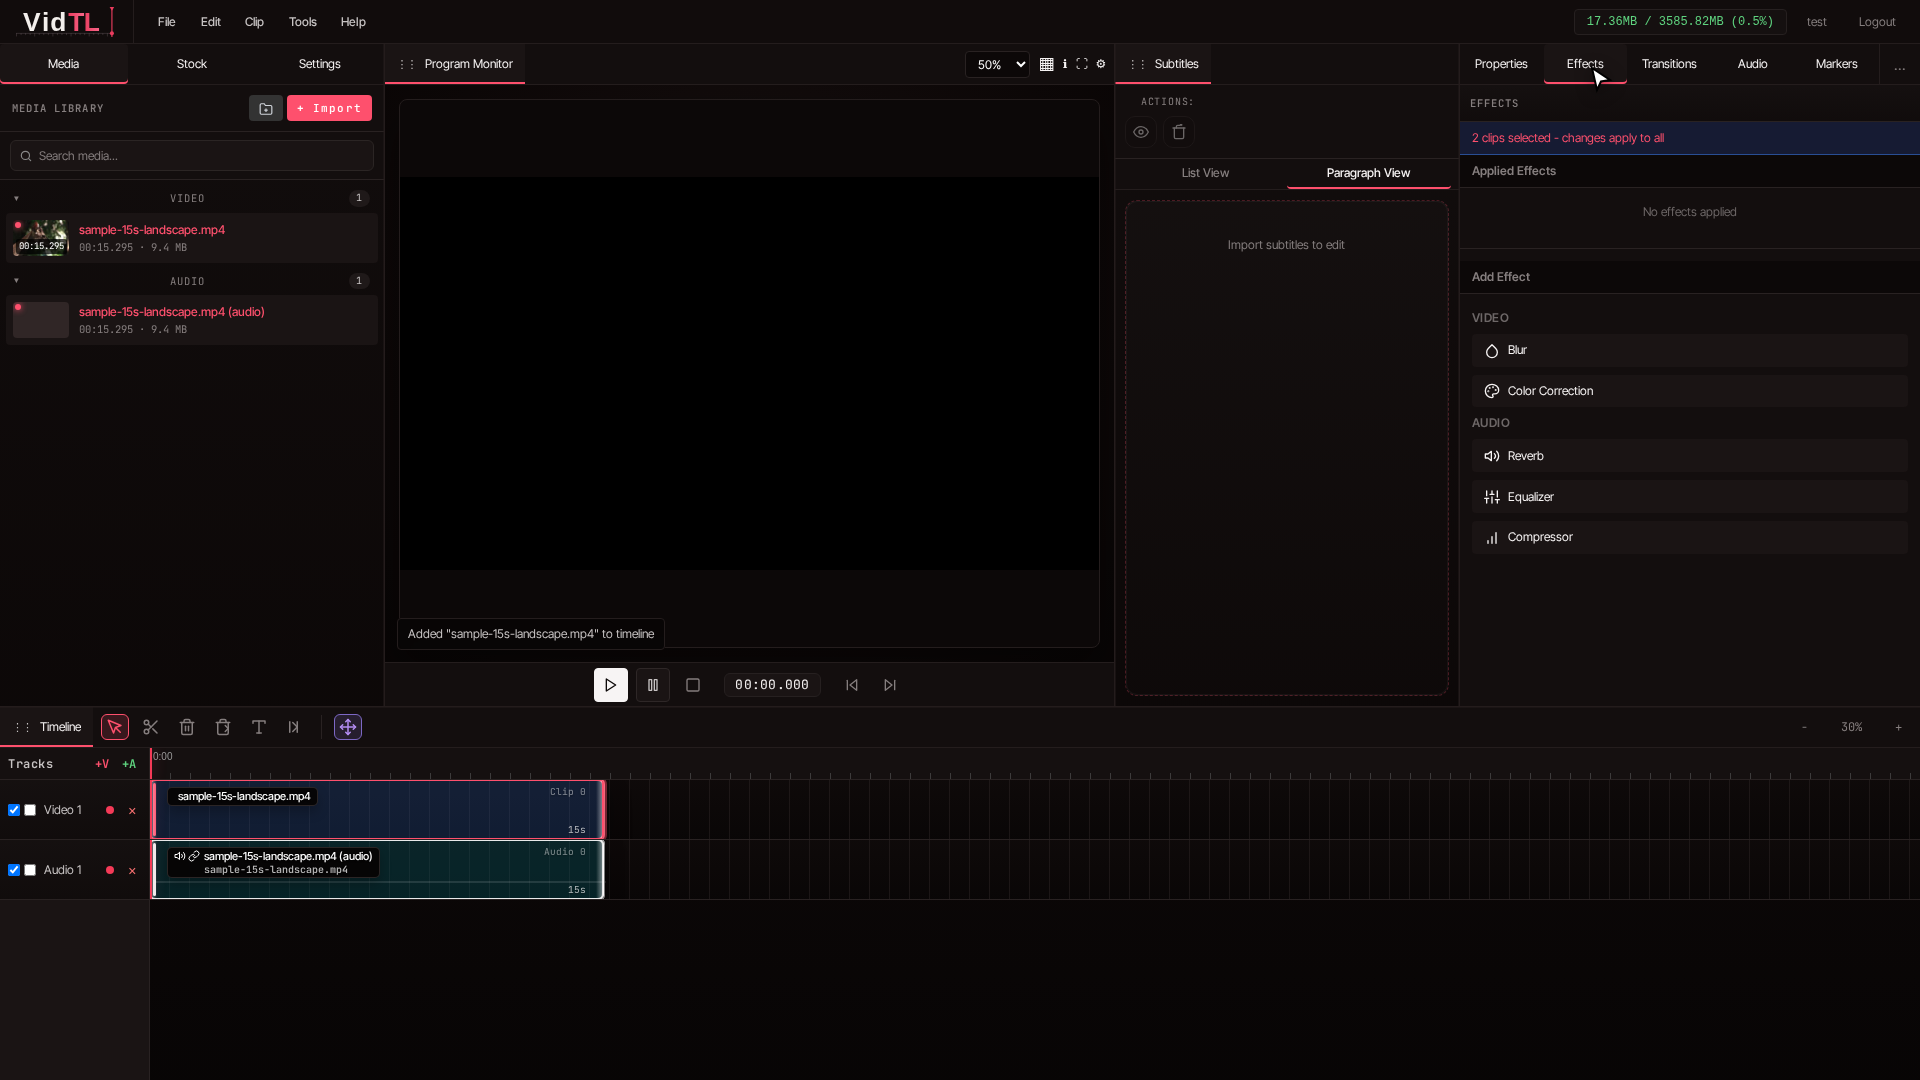
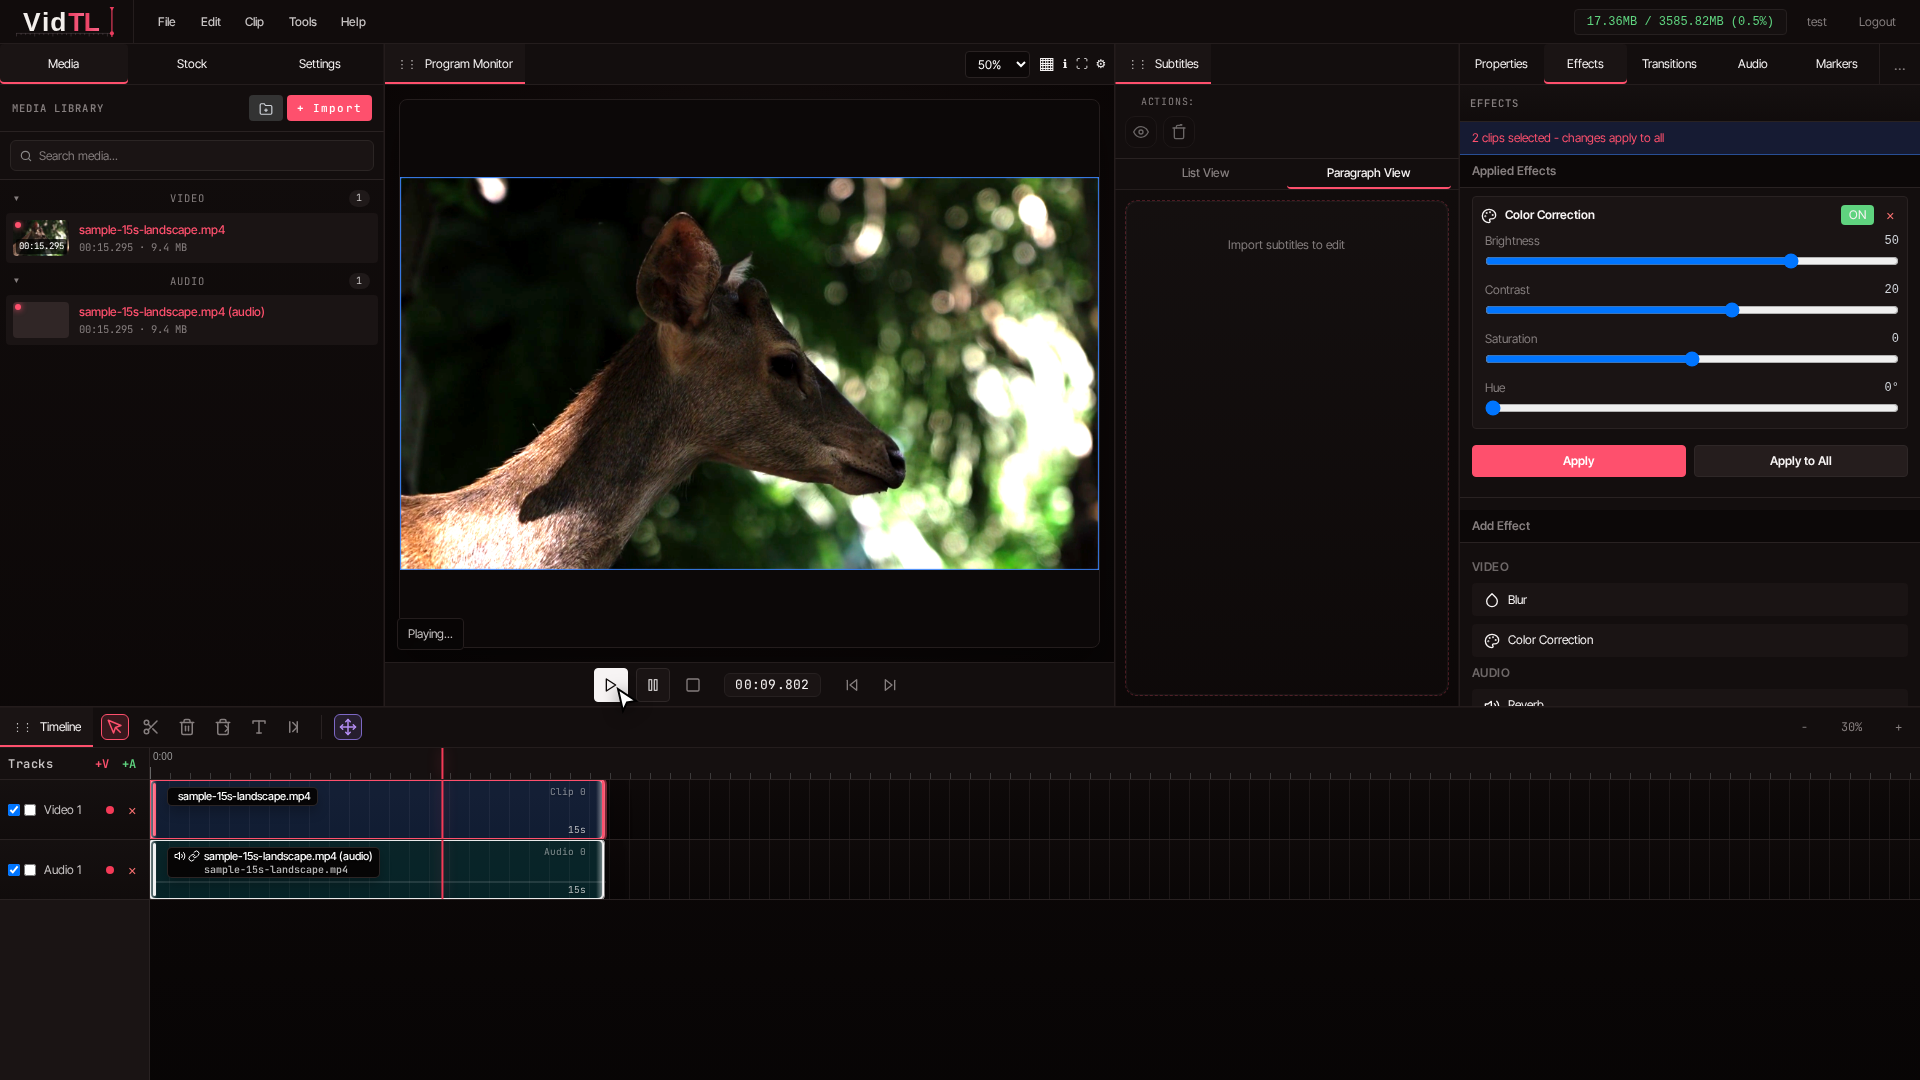
3) Open the Effects panel on the right side
On the right sidebar, click Effects. This is where visual adjustments are controlled for the selected clip. Click and drag the "Color Correction" effect to your clip on the timeline. Keep your Program Monitor visible in the center so you can judge changes in real time while moving sliders.
4) Increase brightness in small increments
Move the brightness control a little at a time, then pause and look at the preview. Good practice is short adjustments followed by quick checks. This keeps the image natural and prevents accidental over-editing.
- Start with a modest increase.
- Watch faces first, then backgrounds.
- Check white areas like walls, shirts, or sky.
- If everything looks faded, pull brightness back slightly.
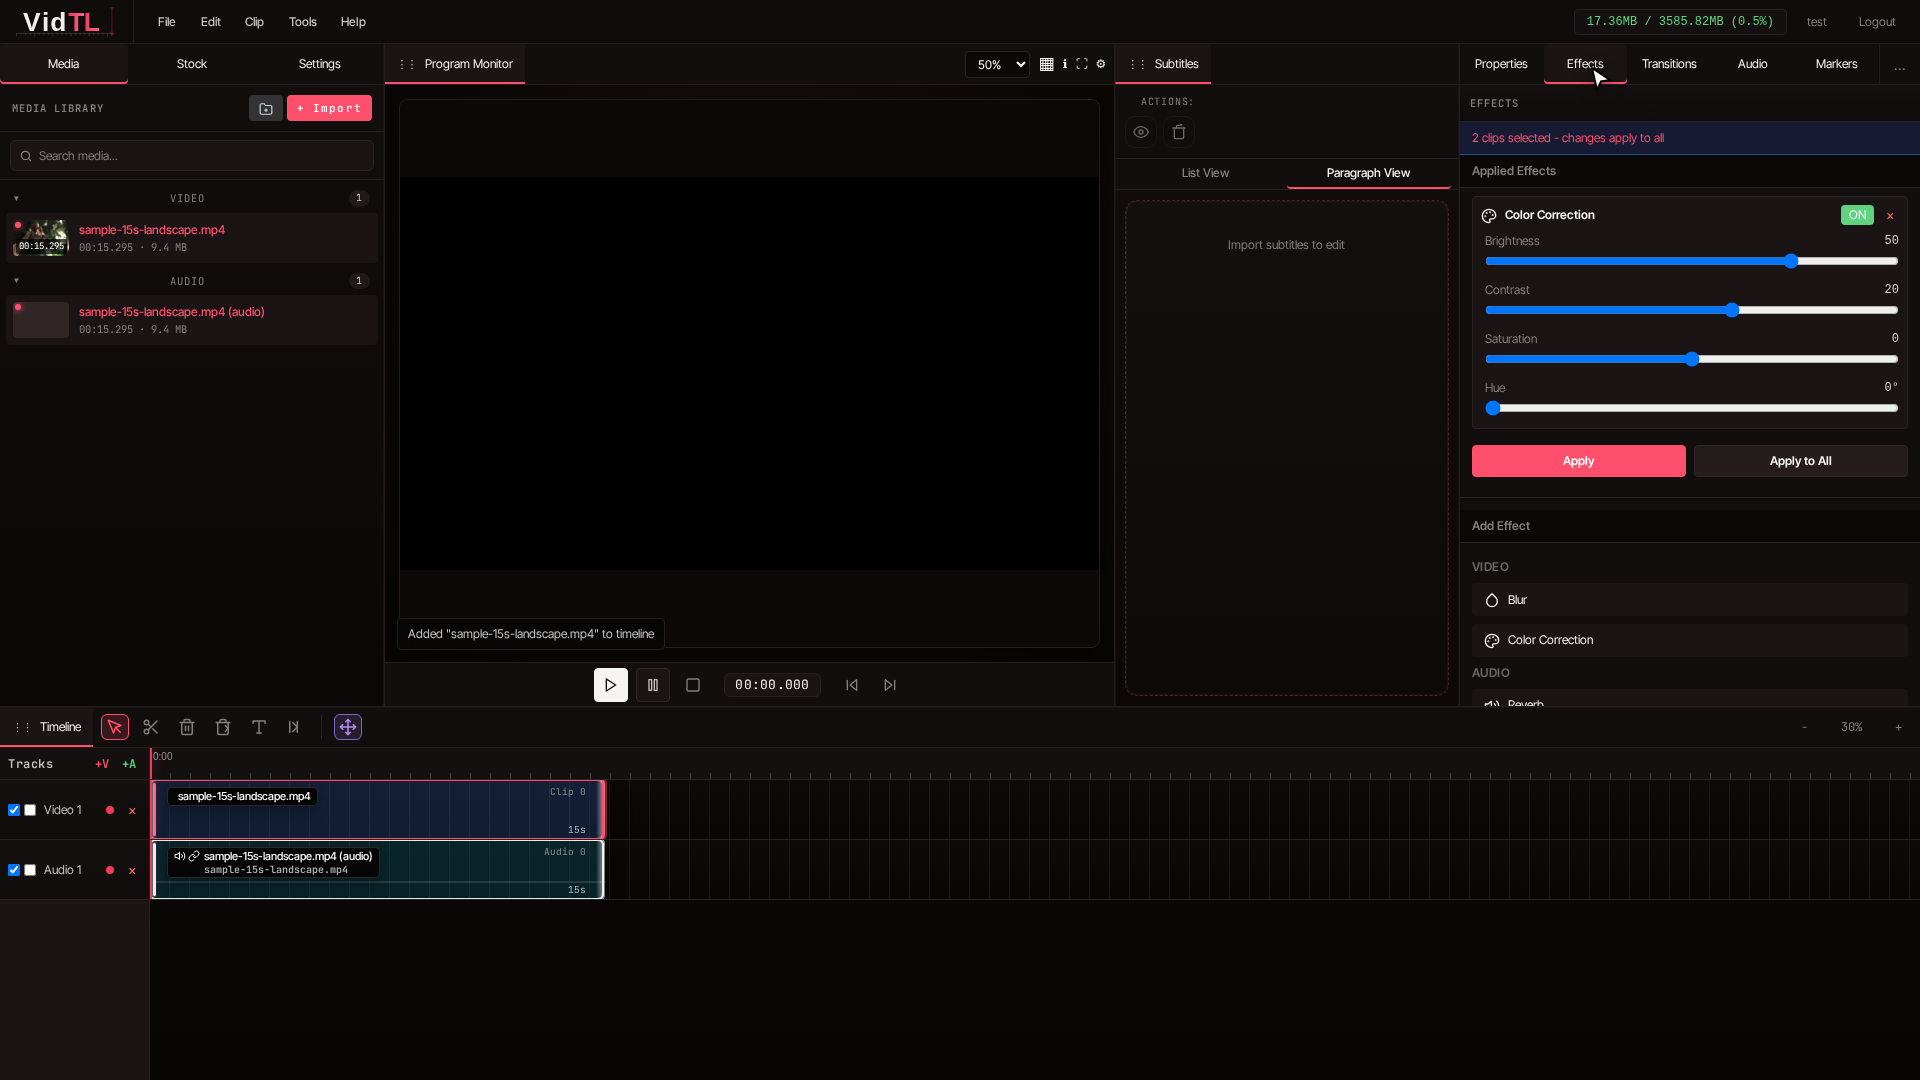
5) Balance with contrast so the image does not look washed out
After brightening, add a small contrast tweak to restore depth. In many clips, brightness alone lightens shadows but softens overall definition. A gentle contrast increase brings shape back into faces, clothing, and objects.
If you are editing talking head content, zoom your attention in this order: eyes, skin tone, then background. If eyes become too flat or skin loses tone, reduce either brightness or contrast by a tiny amount and preview again.
Action takeaway: Think in pairs, brightness to reveal detail, contrast to keep depth.
6) Preview from beginning to end before export
A setting that looks good in one frame may be too strong in another scene. Play through your clip in the Program Monitor and watch transitions between darker and brighter moments. Make micro-adjustments until the whole clip feels consistent.
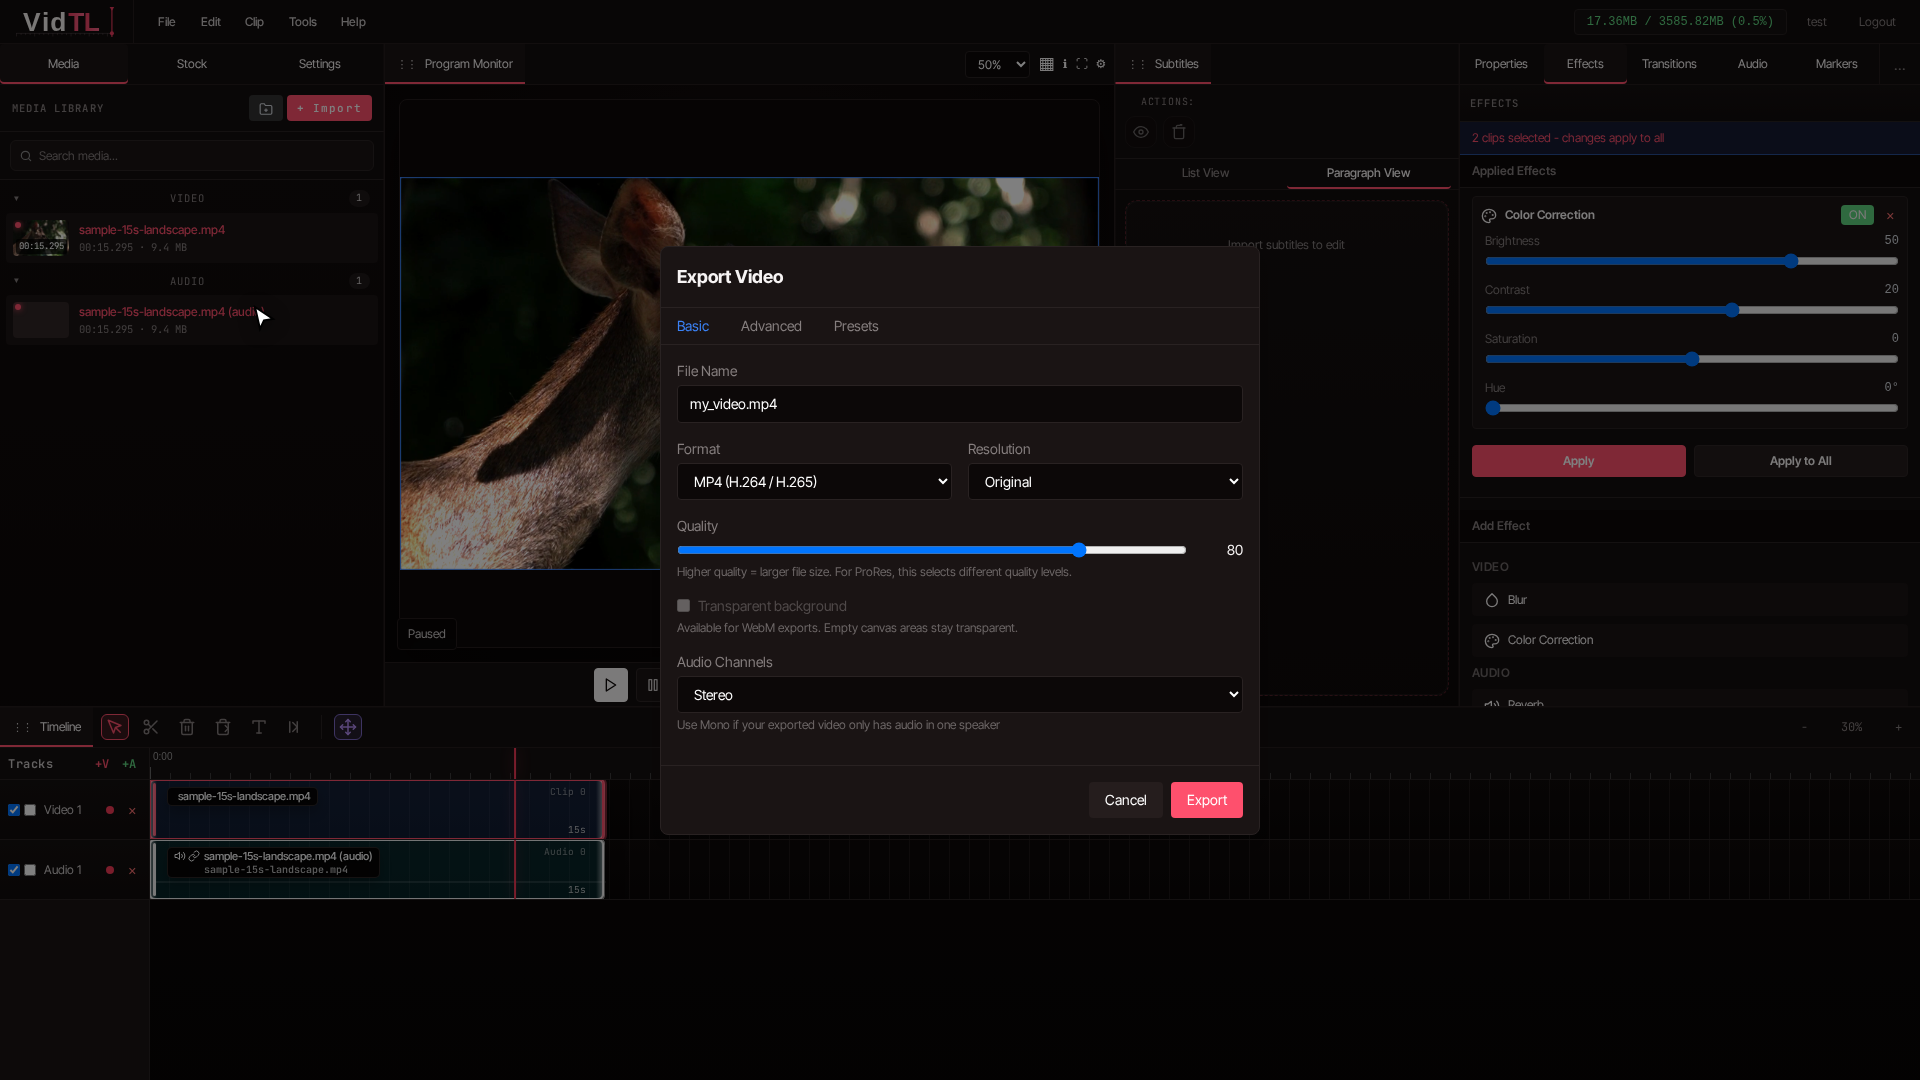
7) Export your final video
When everything looks right, export your video. Keep filename, format, and resolution aligned with where the video will be published. For most creators, MP4 at the target platform resolution is a practical default.
Action takeaway: Always preview the full clip before export so your brightness correction stays consistent scene to scene.